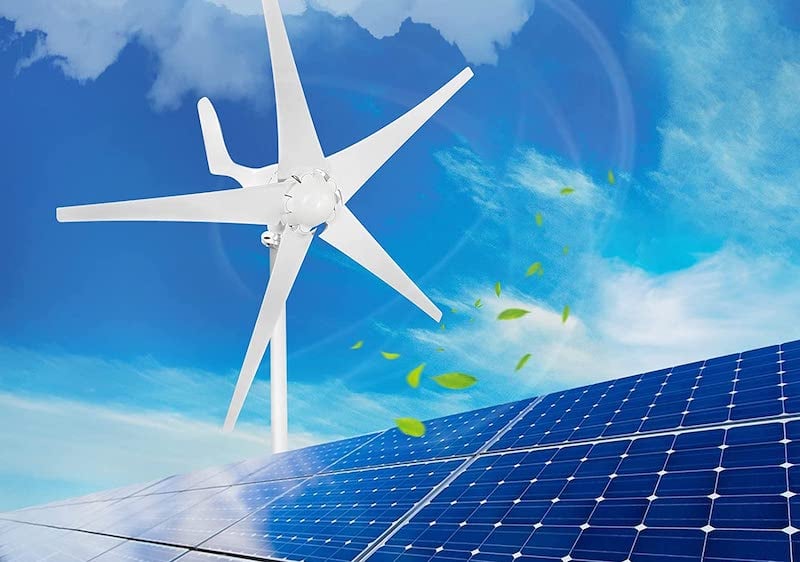
As we transition towards renewable energy sources, harnessing the power of both wind and sun can provide a reliable and sustainable solution for our energy needs.
However, integrating these two intermittent energy sources requires careful planning and management to ensure efficient and stable operation.
This is where a charge controller comes into play – it acts as a brain of the renewable energy system, regulating the flow of power between the wind turbine or solar panel, and the battery bank.
By effectively managing the charging and discharging of the batteries, a high-quality charge controller can optimize the performance of both wind and solar powers, ensuring a consistent supply of clean energy.
Understand your system requirements
Before selecting a charge controller, it’s important to understand your system requirements, including the voltage and current output of your wind and solar panels, as well as the type of battery you will be using.
The voltage and current output of your wind and solar panels, as well as the type of battery you will be using, all play a important role in determining the appropriate charge controller for your system.
For instance, if your solar panels produce a higher voltage than your battery can handle, you may need a step-down transformer to prevent damage to your battery and charge controller.
Similarly, if your battery requires a specific charging voltage or current, you’ll need to choose a charge controller that can provide the appropriate level of power to meet those needs.
By taking the time to understand your system requirements, you can select a charge controller that is optimized for your specific setup and ensure that your renewable energy system operates at peak performance.
Choose the right charge controller
A charge controller is responsible for regulating the flow of power between your wind and solar panels and your battery bank. Look for a charge controller that can handle the voltage and current output of your panels, and that is compatible with your battery type.
Choosing the right charge controller is a important decision for your wind and solar power system.
The charge controller is responsible for regulating the flow of power between your panels and your battery bank, ensuring that your batteries are charged safely and efficiently.
When selecting a charge controller, it is essential to consider the voltage and current output of your panels, as well as the type of battery you are using.
Look for a charge controller that can handle the maximum voltage and current output of your panels, and that is designed for use with your specific battery type.
Some charge controllers are only compatible with certain battery chemistries, so it’s essential to choose one that is compatible with your system.
In addition to voltage and current handling, consider the features and settings offered by the charge controller.
Do you need a charge controller with an LCD display or can you manage with a simple LED indicator?
Do you want a charge controller with multiple stages of charging or one that simply charges to a set voltage?
By considering these factors, you can select the right charge controller for your wind and solar power system and ensure optimal performance and longevity.
Configuring the charge controller
Once you have selected a charge controller, you will need to configure it properly to ensure that it is functioning correctly. This may involve setting the charging voltage and current limits, as well as configuring any safety features, such as overvoltage protection.
Configuring the charge controller is a critical step in ensuring that your solar power system is functioning correctly and safely.
After selecting a charge controller, you will need to configure it properly to ensure that it is functioning correctly.
This may involve setting the charging voltage and current limits, as well as configuring any safety features, such as overvoltage protection.
To set the charging voltage and current limits, you will need to refer to the manufacturer’s specifications for the appropriate values for your solar panel and battery combination.
It is important to ensure that the charging voltage and current limits are set to the correct values to avoid overcharging or undercharging your batteries, which can lead to reduced lifespan or even damage to the batteries or other components in the system.
You will need to configure any safety features, such as overvoltage protection, to ensure that the system is protected from overvoltage conditions that can damage the components.
Overvoltage protection can be achieved through the use of a voltage sensor that triggers a shutdown of the system in the event of an overvoltage condition.
It is important to carefully follow the manufacturer’s instructions when configuring the charge controller to ensure that the system is set up correctly and safely.
Incorrect configuration can lead to system malfunction or even damage to the components, so it is essential to take the time to carefully review the manufacturer’s documentation and follow the recommended settings and procedures.
Connecting the wind and solar panels
Connect the wind and solar panels to the charge controller, ensuring that the positive leads are connected to the positive terminals of the charge controller and the negative leads are connected to the negative terminals.
Connecting wind and solar panels to a charge controller is a important step in setting up an off-grid renewable energy system.
To ensure proper operation and safe installation, follow these steps
Connect the positive leads of the wind and solar panels to the positive terminals of the charge controller.
This is typically marked with a + sign or a red wire.
Connect the negative leads of the wind and solar panels to the negative terminals of the charge controller.
This is typically marked with a – sign or a black wire.
Use high-quality cables and connectors to ensure a secure connection and prevent any loose or damaged connections.
Make sure that the charge controller is set to the correct voltage and current rating for your wind and solar panels.
This information can usually be found on the manufacturer’s specifications or on the charge controller itself.
Double-check all connections before turning on the system to ensure that everything is securely connected and there are no loose wires or damaged components.
Connecting the battery bank
Connect the battery bank to the charge controller, ensuring that the positive leads are connected to the positive terminals of the charge controller and the negative leads are connected to the negative terminals.
When connecting the battery bank to the charge controller, it is important to ensure that the positive leads are connected to the positive terminals of the charge controller and the negative leads are connected to the negative terminals.
This step is essential for proper charging and maintenance of the batteries, as well as for ensuring the safe operation of the system.
To begin, the positive lead from the battery bank should be connected to the positive terminal of the charge controller using a suitable cable.
This should be done with care to prevent any damage to the wires or the terminals.
Next, the negative lead from the battery bank should be connected to the negative terminal of the charge controller, again using a suitable cable and taking precautions to avoid any damage.
It is important to double-check all connections to ensure that they are secure and correct before moving on to the next step.
Proper connection of the battery bank to the charge controller is important for the overall performance and safety of the solar charging system, and should not be overlooked or rushed.
Monitoring the system
It is important to monitor your wind and solar power system to ensure that it is functioning correctly. This may involve checking the voltage and current output of the panels, as well as the state of charge of the battery bank.
Monitoring your wind and solar power system is important to ensuring optimal performance and longevity.
To monitor the system effectively, you should check the voltage and current output of the panels regularly.
This will help you identify any issues or malfunctions that may arise, allowing you to address them promptly.
It is essential to monitor the state of charge of the battery bank, as this will help you maintain a sufficient charge level to meet your energy needs.
You can use a charge controller or a monitor ing system to track the voltage, current, and state of charge of your system.
By regularly monitoring your wind and solar power system, you can ensure that it is functioning correctly and make any necessary adjustments to optimize its performance.
Balancing the system
In a combined wind and solar power system, it is important to balance the output of the wind and solar panels to ensure that the battery bank is properly charged. This may involve adjusting the charging voltage and current limits, as well as the connection points between the panels and the charge controller.
To effectively balance the system in a combined wind and solar power setup, it’s important to ensure that the output of the wind and solar panels is properly synchronized to charge the battery bank.
This can be achieved by adjusting the charging voltage and current limits, as well as the connection points between the panels and the charge controller.
The charge controller should be set to optimize the charging voltage and current to match the output of the wind and solar panels.
This will help to prevent overcharging or undercharging of the battery bank, which can lead to reduced performance or even premature failure.
The connection points between the panels and the charge controller should be carefully selected to ensure efficient energy transfer.
For instance, using a high-quality, low-loss DC cable can help to minimize energy loss during transmission.
Furthermore, the charging voltage and current limits should be adjusted based on the specific requirements of the battery bank and the system’s overall capacity.
Overall, balancing the system in a combined wind and solar power setup requires careful attention to detail and precise tuning to ensure optimal performance and longevity of the system’s components.
Sizing the system
Properly sizing your wind and solar power system is critical to ensuring that it functions correctly. This may involve determining the maximum power output of the panels, as well as the capacity of the battery bank and the load that it will power.
Sizing your wind and solar power system is a important step in ensuring that it functions correctly and meets your energy needs.
The process involves determining the maximum power output of the panels, as well as the capacity of the battery bank and the load that it will power.
To start, you’ll need to assess your energy requirements and determine the amount of power you need to generate.
This will help you determine the size of the solar panels and battery bank you’ll need to support your system.
For example, if you need to power a load of 1000W, you’ll need solar panels that can produce at least 1000W of power.
You’ll need to consider the capacity of the battery bank, which should be sized to store enough energy to power your load for several hours during periods of low solar or wind input.
Proper sizing of your system will ensure that it operates within its designated parameters, maximizing efficiency and lifespan.
For example, if you need to power a 1000W load, you’ll need solar panels that can produce at least 1000W of power.
Consider the capacity of the battery bank, which should be sized to store enough energy to power your load for several hours during periods of low solar or wind input.
Proper sizing of your system will ensure that it operates within its designated parameters, maximizing efficiency and lifespan.
Your wind and solar power system must be properly sized to ensure it functions correctly.
To do this, determine the maximum power output of the panels and the capacity of the battery bank, as well as the load that the system will power.
Assess your energy requirements to determine the appropriate size of the solar panels and battery bank.
For example, if you need to power a 1000W load, you will need solar panels that can produce at least 1000W of power.
The capacity of the battery bank should be sized to store enough energy to power your load for several hours during periods of low solar or wind input.
Proper sizing of your system will ensure that it operates within its designated parameters, maximizing efficiency and lifespan.
Want More? Dive Deeper Here!
Hey there! If you’re the type who loves going down the rabbit hole of information (like we do), you’re in the right spot. We’ve pulled together some cool reads and resources that dive a bit deeper into the stuff we chat about on our site. Whether you’re just killing time or super into the topic, these picks might just be what you’re looking for. Happy reading!
- (PDF) Arduino Based Hybrid MPPT Controller for Wind and Solar
- (PDF) Coordinated Supply of Solar and Wind Energy Using MPPT to Power Micro-Grids along with Battery | Soumya Saraswati – Academia.edu
- (PDF) Hybrid Power System Using Wind Energy and Solar Energy | RADHESH NARAYANAN – Academia.edu
- (PDF) Analysis and Design of a Domestic Solar-Wind Hybrid Energy System for Low Wind Speeds

