Rainwater harvesting is a important aspect of sustainable living, especially for those who live off the grid.
By collecting and storing rainfall, you can provide a reliable source of clean water for drinking, cooking, and other household needs.
We’ll show you how to create your own DIY rainwater harvesting system using readily available materials and simple tools.
Our step-by-step instructions will help you design and build a system that fits your specific needs and budget, ensuring you have access to safe and abundant water regardless of the weather.
Determine your needs
Calculate your water needs based on the number of people in your household, your climate, and your intended uses (e.g., drinking, cooking, irrigation). This will help you determine the size and complexity of your rainwater harvesting system.
The first step is to calculate your water needs based on the number of people in your household, your climate, and your intended uses.
For example, if you live in a hot, dry climate and have a family of four, you’ll need more water for drinking and cooking than if you lived in a mild, wet climate with a smaller family.
If you plan to use your rainwater for irrigation, you’ll need to consider the size of your garden and the types of plants you plan to grow.
To calculate your water needs, start by calculating your household’s daily water use.
A typical household of four people uses around 400 gallons of water per day for drinking, cooking, and personal hygiene.
If you plan to use your rainwater for irrigation, you’ll need to add the amount of water your garden will require.
For example, if you plan to irrigate a garden that requires 200 gallons of water per day, you’ll need to multiply the daily water use by the number of people in your household and add the irrigation requirement.
In this example, you would need a rainwater harvesting system that can collect and store at least 800 gallons of water per day (400 gallons x 4 people + 200 gallons for irrigation).
Once you have a sense of your water needs, you can begin to design a rainwater harvesting system that meets those needs.
This will help you determine the size and complexity of your system, as well as the type of storage tank and other components you’ll need.
For example, if you live in an area with frequent rain showers, you may need a larger system to capture and store the water.
On the other hand, if you live in an area with little rainfall, you may be able to get by with a smaller system that can capture and store less water.] To accurately determine your needs, you need to first calculate your daily water usage based on the number of people in your household, your climate, and your intended uses.
For example, you will need to calculate how much water you will need for drinking, cooking, and personal hygiene.
If you plan to use your rainwater for irrigation, you will need to add the amount of water your garden will require.
For example, if you plan to irrigate a garden that requires 200 gallons of water per day, you will need to multiply the daily water use by the number of people in your household and add the irrigation requirement.
Based on these calculations, you can then determine the size of your rainwater harvesting system.
Choose a collection surface
Select a surface that can collect and store rainwater, such as a roof, a deck, or a patio. Consider the size and slope of the surface, as well as any potential contaminants (e.g., debris, leaves) that may enter the system.
When selecting a collection surface for your rainwater harvesting system, it’s important to consider several factors to ensure optimal performance and minimize maintenance requirements.
The surface should be large enough to collect and store rainwater, and its slope should be angled to allow for proper drainage and prevent waterlogging.
The surface material should be able to withstand exposure to the elements and be resistant to damage from any potential contaminants, such as debris or leaves.
For example, a roof made of a durable material like asphalt or metal can be an effective collection surface, as it can collect rainwater from a large area and is relatively easy to maintain.
A deck or patio made of materials like wood or composite can also be suitable, as long as they are properly sealed and maintained to prevent water damage and contamination.
It’s also important to consider the slope of the collection surface, as a steeper slope will allow for better drainage and prevent waterlogging.
A slope of 1-2 inches per foot is recommended to ensure proper drainage and minimize the risk of water accumulation.
It’s important to ensure that the collection surface is free of any potential contaminants that could enter the system and compromise its performance or safety.
Regular cleaning and maintenance of the surface can help prevent the buildup of debris and leaves, and ensure that the system operates at its full potential.
Install gutters and downspouts
Attach gutters to the edge of your collection surface to collect and direct rainwater into downspouts. Use a downspout extension to direct the water into a storage tank.
Installing gutters and downspouts is a important step in creating an effective rainwater harvesting system.
Attach gutters to the edge of your collection surface, such as a roof or a ground-level trench, to collect and direct rainwater into downspouts.
The gutters should be made of a durable material like aluminum or vinyl and should be sloped to encourage water flow.
Next, connect the downspouts to a downspout extension, which will direct the water into a storage tank.
This will ensure that the water is collected and stored efficiently, without any damage to your home or property.
When selecting a downspout extension, consider the height and location of your storage tank, as well as the pitch of your roof.
A longer extension may be necessary if your tank is located farther away from the downspout or if your roof has a steeper pitch.
Consider the size of your gutters and downspouts, as well as the material of your storage tank, to ensure proper compatibility and effective water flow.
By carefully selecting and installing gutters and downspouts, you can ensure that your rainwater harvesting system functions optimally and provides you with a reliable source of water for irrigation, flushing, and other non-potable uses.
Select a storage tank
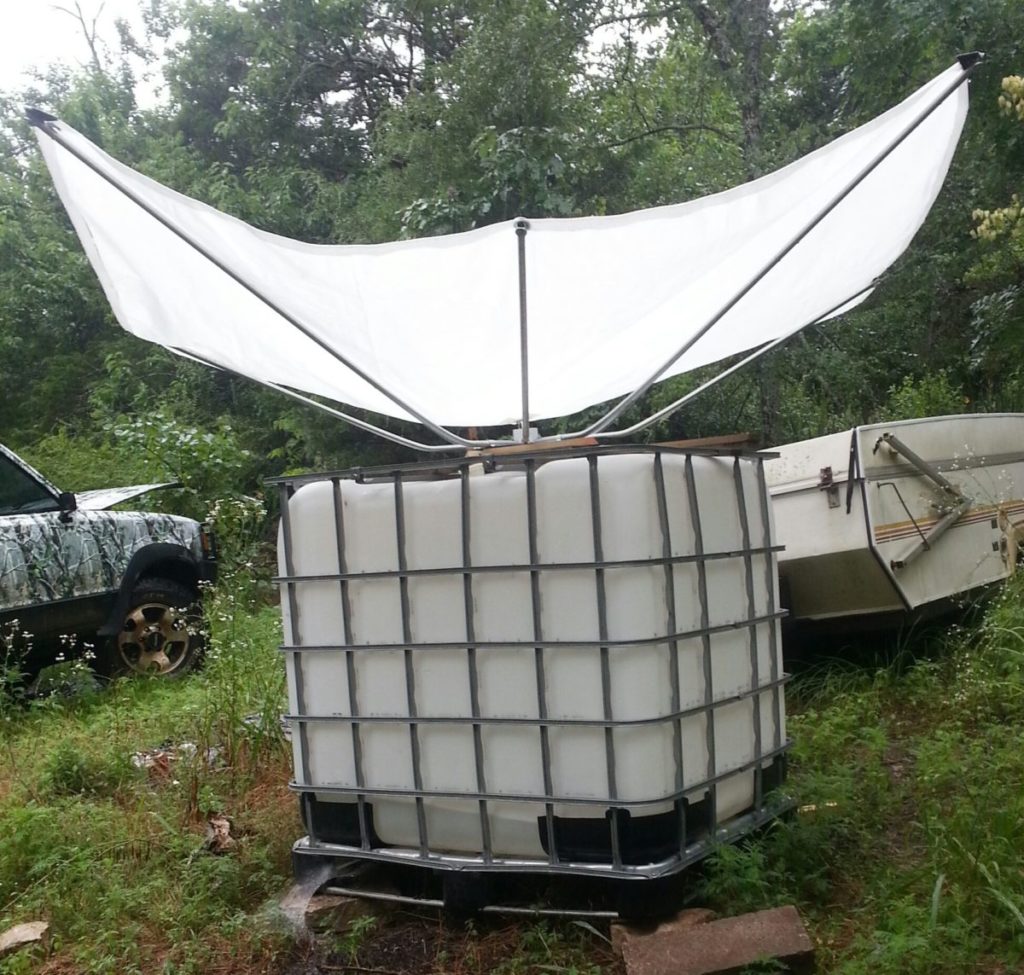
Choose a storage tank that can hold the amount of rainwater you need, taking into account your collection surface size and your needs. Consider the tank material, size, and shape when making your selection.
When selecting a storage tank for your rainwater harvesting system, it’s essential to consider several factors to ensure you choose the right tank for your needs.
First, you’ll need to determine the size of the tank based on the collection surface area and your specific needs.
Look for a tank that can hold the amount of rainwater you expect to collect, taking into account factors such as the size of your roof and the frequency of rainfall in your area.
Next, consider the material of the tank, as different materials have varying advantages and disadvantages.
For example, plastic tanks are lightweight and easy to install, but they may be more prone to cracking and may have a shorter lifespan.
Metal tanks, on the other hand, are more durable and can withstand harsher weather conditions, but they may be heavier and more difficult to install.
Think about the shape of the tank, as a rounded tank may be more efficient at storing rainwater, while a rectangular tank may be better suited for certain installation locations.
Ensure that the tank you choose is certified for use in your area and meets all relevant safety standards.
With the right storage tank, you’ll be well on your way to a successful rainwater harvesting system.
Use a first flush device
Install a first flush device to ensure that the initial flow of water from the roof is directed away from your storage tank, reducing the risk of contamination.
When rainwater harvesting, it’s essential to use a first flush device to protect your stored water from any contaminants that may have accumulated on your roof.
A first flush device ensures that the initial flow of water from the roof is directed away from your storage tank, preventing any debris, dirt, or other impurities from entering your storage system.
This device is specifically designed to capture the initial flow of water, also known as the first flush, which typically contains the highest concentration of contaminants.
By directing this flow away from your storage tank, you can significantly reduce the risk of contamination and ensure the quality of your stored water.
First flush devices are typically simple and easy to install, and they can be positioned either under the downspout of your gutter system or near the overflow point of your storage tank.
They can be adjusted to allow for different volumes of water to be directed away from the storage tank, depending on your specific needs and the amount of rainfall in your area.
By investing in a high-quality first flush device, you can enjoy peace of mind knowing that your stored rainwater is safe for consumption and use in your home or garden.
Add a filtration system
Install a filtration system to remove sediment, debris, and other contaminants from the rainwater. This can include a sedimentation tank, a sand filter, or a reverse osmosis system.
Adding a filtration system to your rainwater harvesting system is important to ensure the quality of the water you collect.
A filtration system can remove sediment, debris, and other contaminants from the rainwater, providing you with a clean and safe source of water for your home or business.
There are several types of filtration systems available, including sedimentation tanks, sand filters, and reverse osmosis systems.
Sedimentation tanks use gravity to separate sediment from the water, while sand filters use a bed of sand to remove impurities.
Reverse osmosis systems, on the other hand, use a semi-permeable membrane to remove impurities and minerals from the water.
By installing a filtration system, you can rest assured that your rainwater is free from contaminants and safe for use in your home or business.
Install a pump and piping
Install a pump and piping to deliver the rainwater to your desired use points, such as a kitchen sink or an irrigation system.
Installing a pump and piping system is a important step in harnessing rainwater for your desired use points.
The pump should be sized appropriately to deliver the water pressure and volume needed for your specific application.
The piping materials should be durable and resistant to corrosion, and should be sized to ensure minimal loss of water due to friction and turbulence.
When selecting a pump, consider the distance the water needs to be delivered, as well as the elevation difference between the collection system and the use points.
Submersible pumps are often the most practical choice, as they can be installed directly in the rainwater collection system and are easy to maintain.
Centrifugal pumps are also an option, but require more space and maintenance.
Once the pump and piping system is installed, it’s essential to test the system to ensure proper functionality and flow rates.
Regular maintenance, such as cleaning the pump and inspecting the pipes, will also be necessary to keep the system running smoothly.
With a properly installed pump and piping system, you can reliably deliver rainwater to your desired use points, such as a kitchen sink or an irrigation system.
Want More? Dive Deeper Here!
Hey there! If you’re the type who loves going down the rabbit hole of information (like we do), you’re in the right spot. We’ve pulled together some cool reads and resources that dive a bit deeper into the stuff we chat about on our site. Whether you’re just killing time or super into the topic, these picks might just be what you’re looking for. Happy reading!


