If you’re looking to power your off-grid homestead or cabin with clean energy from the sun, DIY solar panel mounting is a great place to start.
Not only can it save you thousands of dollars in installation costs, but it also allows for greater customization and flexibility in designing your solar array.
With the right materials and tools, anyone can create a sturdy and efficient mounting system for their solar panels.
We’ll cover the basics of DIY solar panel mounting, including material selection, measuring and preparing your roof or ground-mount surface, and securing your panels in place.
Whether you’re a seasoned diyer or just starting out, with these tips and techniques, you can successfully install your own off-grid solar panel system and start enjoying the benefits of renewable energy.
Determine your solar panel needs
Before you start building your solar panel mounting system, you need to determine your energy needs and the number of solar panels you’ll need to meet those needs. Consider factors such as your location, the amount of energy you use, and the amount of sunlight your location receives.
To start, consider your location and the amount of sunlight it receives.
This will help you determine the average daily energy output of your solar panels.
Next, assess your energy usage by reviewing your past utility bills to determine your total daily energy consumption.
Compare your energy usage to the average daily energy output of your solar panels to determine how many panels you’ll need to meet your energy needs.
Consider the efficiency of the solar panels you plan to use, as well as any shading or obstructions that may affect their performance.
By carefully evaluating these factors, you can determine the appropriate number of solar panels to meet your energy needs and ensure a successful and efficient solar panel installation.
Choose a mounting system type
There are several types of solar panel mounting systems, including ground-mounted, roof-mounted, and tracking systems. Choose a type that is suitable for your location, budget, and energy needs.
When it comes to installing solar panels, there are several types of mounting systems to choose from.
Ground-mounted systems are ideal for large-scale commercial installations or for homeowners with plenty of land.
These systems are installed on the ground and can be tilted to optimize energy production.
Roof-mounted systems, on the other hand, are perfect for homeowners with limited space or budget constraints.
These systems are installed directly on the roof of your home and can be angled to maximize energy production.
Tracking systems, which follow the sun’s movement throughout the day, are the most expensive option but can produce up to 45% more energy than fixed systems.
To choose the right mounting system for your location, budget, and energy needs, consider the following factors
Location: If you have plenty of land and live in an area with ample sunlight, a ground-mounted system may be the best option.
If you live in an apartment or have limited roof space, a roof-mounted system is a more practical choice.
Budget: Ground-mounted systems are typically more expensive than roof-mounted systems, so if budget is a concern, you may want to consider a roof-mounted system.
Tracking systems are the most expensive option but can provide the highest energy production.
Energy needs: If you have a high energy demand, such as a large house or a business, a tracking system may be the best choice.
If you have a smaller energy demand, a roof-mounted or fixed ground-mounted system may be sufficient.
Ultimately, the type of solar panel mounting system you choose will depend on your specific needs and circumstances.
When selecting a solar panel mounting system, it’s important to consider several factors to ensure you choose the most suitable option for your location, budget, and energy needs.
First, consider the location of your solar panel installation.
If you have ample land and live in an area with abundant sunlight, a ground-mounted system may be the best option.
However, if you live in an apartment or have limited roof space, a roof-mounted system is a more practical choice.
Next, take into account your budget.
Ground-mounted systems are typically more expensive than roof-mounted systems, so if budget is a concern, you may want to consider a roof-mounted system.
Tracking systems are the most expensive option but can provide the most significant energy production increase.
It’s important to consult with a professional solar installer to determine the best option for your specific situation and needs.
Choosing the right solar panel mounting system is a critical decision that can affect the efficiency, cost-effectiveness, and longevity of your solar panel installation.
There are three primary types of mounting systems to consider: ground-mounted, roof-mounted, and tracking systems.
Each system has its advantages and disadvantages, and the best option for you will depend on your specific location, circumstances, and needs.
First, consider the location of your solar panel installation.
Ground-mounted systems are ideal for large, open spaces with abundant sunlight, such as rural or suburban areas.
Roof-mounted systems are more suitable for urban areas with limited space, as they can be easily installed on existing roofs without occupying too much space.
Tracking systems, on the other hand, are best for those who want to maximize energy production and are willing to invest in more advanced technology.
Next, think about your budget.
Ground-mounted systems tend to be more affordable than roof-mounted and tracking systems, but they may require more land and infrastructure.
Roof-mounted systems are often more expensive, but they are simpler to install and require minimal additional land or infrastructure.
Tracking systems are generally the most expensive option but can provide the highest energy production increase.
Consider your energy needs.
Tracking systems are ideal for those who need high energy production and are willing to invest in more advanced technology.
However, if your energy needs are relatively low, a ground-mounted or roof-mounted system may be sufficient and more cost-effective.
Choosing the right solar panel mounting system depends on various factors such as location, budget, and energy needs.
Roof-mounted systems are a good option for urban areas with limited space, while tracking systems are ideal for those who need high energy production and are willing to invest in more advanced technology.
Ground-mounted systems tend to be more affordable but require more land and infrastructure.]]
When deciding on a solar panel mounting system, there are several factors to consider to ensure you choose the most appropriate system for your specific needs.
Location is a important factor, as different mounting systems are better suited for certain climates and terrains.
Roof-mounted systems are more suitable for urban areas with limited space, as they can be easily installed on existing roofs without occupying too much space.
Tracking systems, on the other hand, are best for those who want to maximize energy production and are willing to invest in more advanced technology.
Ground-mounted systems are the most affordable option and can be installed in any location, but they require more land and infrastructure.
They also tend to be less aesthetically pleasing compared to roof-mounted systems.
Tracking systems are the most high-tech option and can provide the highest energy production, but they also tend to be the most expensive and require more maintenance.
Ultimately, the right solar panel mounting system for you will depend on a combination of your location, budget, and energy needs.
Considering these factors, you can choose a system that is both cost-effective and meets your energy goals.
With the right system in place, you can enjoy the benefits of solar energy and reduce your carbon footprint.
Prepare the surface
Whether you’re mounting your solar panels on the ground or on a roof, you’ll need to prepare the surface to ensure it’s stable and secure. This may involve clearing any debris, leveling the surface, and securing it with anchors or screws.
Preparing the surface for mounting your solar panels is a important step to ensure a stable and secure installation.
Whether you’re mounting them on the ground or on a roof, you’ll need to clear the area of any debris and level the surface.
This will help prevent any unevenness or shifting of the panels that could compromise their efficiency and longevity.
For ground-mounted solar panels, you’ll need to clear the area of any vegetation, rocks, or other obstructions.
You may also need to dig holes for the mounting equipment to ensure that the panels are securely fastened to the ground.
For roof-mounted solar panels, you’ll need to check the condition of the roof to ensure that it can support the weight of the panels.
This may involve repairing or replacing any damaged or rotten wood, and securing the panels with anchors or screws.
Regardless of whether you’re mounting your solar panels on the ground or on a roof, it’s important to secure them thoroughly to prevent any movement or shifting over time.
This will not only ensure the longevity of your solar panels but also help maintain their efficiency and maximize your energy output.
Build a frame
To mount your solar panels, you’ll need a frame that can support the weight of the panels and hold them in place. You can build a frame using wood or metal, and attach it to the surface using bolts, screws, or welding.
To effectively install your solar panels, a sturdy frame is a must-have.
This frame should be able to support the weight of the panels and secure them in place, ensuring optimal energy production.
There are two main options for building your frame: wood or metal.
Wood frames are a more traditional choice and can be constructed using readily available lumber.
However, they may not be as durable as metal frames, and may be more prone to warping or rot over time.
Metal frames, on the other hand, are incredibly strong and can support the weight of even the largest solar panels.
They can also be easily customized to fit your specific needs, including adjustable height and tilt.
Regardless of your frame material, it’s essential to secure the solar panels to the surface using bolts, screws, or welding.
This will prevent any movement or shifting of the panels, ensuring consistent energy production.
Be sure to use the appropriate hardware and fasteners for your specific frame and panel type to ensure a safe and secure installation.
Attach the solar panels
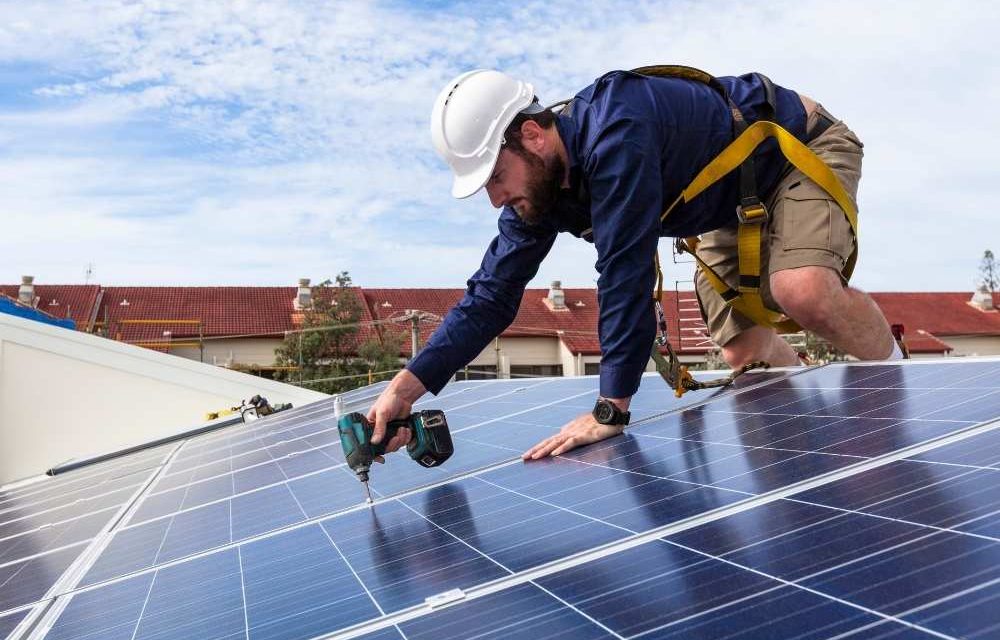
Once you have your frame built, you can attach your solar panels to it. Use bolts, screws, or clamps to secure the panels to the frame, making sure they are aligned properly and there is no gap between them.
Once you have your frame built, the next step is to attach your solar panels to it.
To do this, you will need to use bolts, screws, or clamps to secure the panels to the frame.
It is important to align the panels properly to ensure that they are perpendicular to the sun’s rays and that there is no gap between them.
This will maximize the amount of energy that your solar panel system can generate.
When attaching the panels, it is important to use the appropriate hardware for the job.
For example, you may need to use stainless steel bolts or rust-resistant screws to ensure that the panels remain securely attached to the frame over time.
You should use clamps to secure any wiring or other components that are located between the panels and the frame.
This will help to prevent any loose connections or other issues that could impact the performance of your solar panel system.
Overall, attaching the solar panels to the frame is a critical step in the installation process, and it is important to take your time and use the appropriate hardware to ensure that the panels are securely attached and able to generate as much energy as possible.
Add an inverter
An inverter converts the DC power produced by your solar panels into AC power that can be used in your home. Choose an inverter that is suitable for your energy needs and mount it in a shaded and well-ventilated area.
An inverter is a important component in any solar panel system, as it converts the DC power produced by your solar panels into AC power that can be used in your home.
This allows you to harness the energy of the sun to power your appliances, lights, and heating and cooling systems.
To ensure optimal performance and safety, it’s important to choose an inverter that is suitable for your energy needs.
When selecting an inverter, consider the wattage of your solar panel system, the number of appliances you want to power, and your energy usage patterns.
Look for an inverter with a high efficiency rating and a wide range of power output to ensure that it can handle your energy demands.
Make sure the inverter is compatible with your solar panel system and other equipment, such as your meter and circuit breaker.
Once you have selected an appropriate inverter, it’s important to mount it in a shaded and well-ventilated area.
This will help ensure that the inverter operates at a consistent temperature and that it has access to the necessary cooling airflow.
Shade can also help prevent overheating, which can damage the inverter and reduce its lifespan.
Proper installation and maintenance of your inverter can help ensure that it operates at peak efficiency and lasts for many years to come.
Install a monitoring system
A monitoring system can help you track your solar panel’s performance and detect any issues. Choose a monitoring system that is compatible with your inverter and can be accessed remotely.
A monitoring system is an essential tool for any solar panel installation.
Not only can it help you track your system’s performance over time, but it can also detect any issues that may arise and alert you to take corrective action.
By choosing a monitoring system that is compatible with your inverter and can be accessed remotely, you can keep a close eye on your solar panels from anywhere, at any time.
This means you can quickly identify any problems and take steps to address them before they become major issues.
Plus, with a remote monitoring system, you can stay informed about your solar panel’s performance even when you’re not at home.
This can give you peace of mind and help you ensure that your solar panels are running at their best, all the time.
Maintain your system
Solar panel mounting is a DIY project that requires some maintenance. Make sure you clean your panels regularly, inspect them for any damage, and keep your system free from debris and shade.
Solar panel mounting is a DIY project that requires some maintenance to ensure optimal performance and longevity of your solar panel system.
Regular cleaning is essential to remove dirt, dust, and debris that can accumulate on the panels and reduce their efficiency.
Use a soft-bristled brush, a hose, or a cleaning solution specifically designed for solar panels to gently remove any debris or grime.
Inspect your panels regularly for any signs of damage, such as cracks, fractures, or broken glass.
If you notice any damage, contact a professional to repair or replace the affected panels as soon as possible.
Keep your solar panel system free from shade, which can significantly reduce its efficiency.
Trim any trees or plants that may be casting shade on your panels, and ensure that any obstacles or debris are removed from around the system.
Want More? Dive Deeper Here!
Hey there! If you’re the type who loves going down the rabbit hole of information (like we do), you’re in the right spot. We’ve pulled together some cool reads and resources that dive a bit deeper into the stuff we chat about on our site. Whether you’re just killing time or super into the topic, these picks might just be what you’re looking for. Happy reading!


