Are you looking for a cost-effective and environmentally friendly way to heat your water?
If so, consider implementing a DIY solar water heating system in your home!
With just a few simple tools and materials, you can harness the power of the sun to provide hot water year-round.
In this step-by-step guide, we’ll walk you through everything you need to know to build your own solar water heating system, from selecting the right materials to installation and maintenance tips.
Get ready to save money on your energy bills while also reducing your carbon footprint with DIY solar water heating.
Understand your solar water heating options
There are two main types of solar water heating systems
Active systems use pumps and controllers to circulate water through the collectors, which allows for more control over the temperature and flow rate of the water.
This type of system is often more expensive than passive systems, but it offers greater flexibility and can be more effective in colder climates.
Passive systems, on the other hand, rely on gravity and natural circulation to move water through the collectors.
These systems are typically less expensive and require less maintenance, but they may not be as effective in colder climates or during periods of low sunlight.
Overall, the best option for you will depend on your specific needs and location, so it’s important to carefully consider the pros and cons of each type of system before making a decision.
Assess your hot water needs
Determine how much hot water you need and when you need it. This will help you decide on the size and number of collectors you’ll need.
To determine the right size and number of solar water heaters you need, it’s essential to assess your hot water needs.
Start by calculating how much hot water you use on a typical day.
Consider factors like the number of people in your household, your water usage habits, and the size of your bathroom and kitchen fixtures.
For example, if you have a large family and take long, hot showers, you’ll need more hot water than a small household with low water usage.
Consider the time of day you need the most hot water.
If you primarily need hot water during peak morning and evening hours, you may need more collectors than if you only need it during the midday hours.
Once you have a good understanding of your hot water needs, you can choose the appropriate size and number of collectors to ensure you have enough hot water for your household’s needs.
Choose the right materials
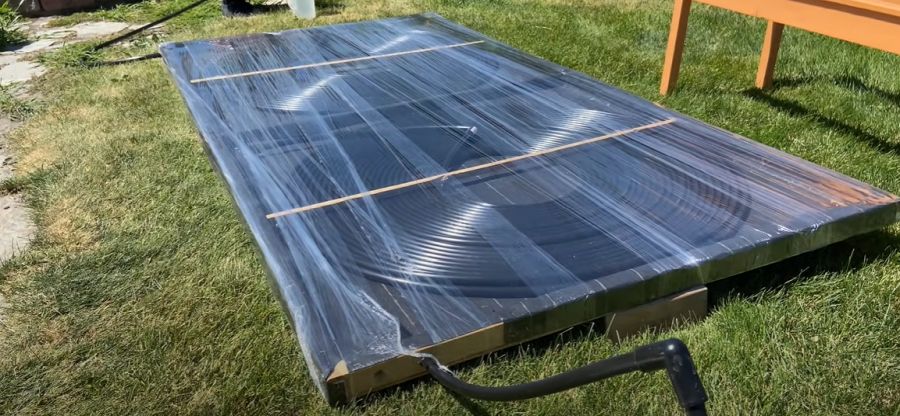
Solar collectors can be made from a variety of materials, including copper, PVC, and PEX. Consider the cost, durability, and ease of installation when selecting materials.
When it comes to choosing the right materials for your solar collectors, there are several factors to consider.
First and foremost, you’ll want to think about the cost of the materials, as well as their durability and ease of installation.
Copper is a popular choice for solar collectors due to its high heat conductivity and durability, but it can be expensive.
PVC and PEX, on the other hand, are more affordable options that are just as effective at collecting solar energy.
One key consideration when selecting materials is the weight of the collector.
Heavier materials like copper can be more difficult to install and maintain, while lighter materials like PVC and PEX are easier to handle.
The material you choose will affect the longevity of your solar collectors.
Copper is known for its long-lasting durability, while PVC and PEX may be more prone to cracking and breaking down over time.
Ultimately, the right materials for your solar collectors will depend on your specific needs and preferences.
By considering factors like cost, durability, and ease of installation, you can choose the materials that best suit your needs and ensure your solar collectors are effective and long-lasting.
Design your system
Determine the size and layout of your system, taking into account the size of your collectors, the number of collectors you’ll need, and the layout of your plumbing.
To effectively design your rainwater harvesting system, it’s important to determine the size and layout of your system, taking into account the size of your collectors, the number of collectors you’ll need, and the layout of your plumbing.
Start by assessing your roof size and shape to determine the amount of rainfall your system can collect.
Consider factors such as the type of roofing material, the pitch of the roof, and any obstructions or shading that may affect the collection rate.
Next, calculate the size of your collectors based on the amount of rainfall your system can collect, taking into account the desired storage capacity and the frequency of use.
Typically, a larger collector size will provide more storage capacity and a more reliable water supply.
When determining the number of collectors you’ll need, consider factors such as the size of your roof, the number of people in your household, and your desired water usage.
A general rule of thumb is to have at least one collector for every 1,000 square feet of roof space.
Design your plumbing layout to ensure an efficient and reliable water delivery system.
This may include connecting your collectors to a storage tank, pump, and filtration system, as well as installing pipes and fittings to distribute the water throughout your home.
By carefully considering the size and layout of your system, you can ensure a well-designed rainwater harvesting system that meets your needs and provides a reliable source of clean water.
Install your collectors
Install your collectors in a location that receives direct sunlight and is free from shading. Make sure they are securely attached to the roof or walls of your home.
To get the most out of your solar collectors, it’s important to install them in a location that receives direct sunlight and is free from shading.
This means choosing a spot on your roof or walls that is exposed to the sun for the majority of the day, and is not obstructed by any trees, buildings, or other objects that could block the sun’s rays.
When installing your collectors, make sure they are securely attached to the roof or walls of your home using sturdy brackets and clamps.
This will ensure that the collectors are stable and able to withstand the elements and any potential wind or snow loads.
Consider the orientation of your collectors to maximize their exposure to the sun.
For example, if you live in the Northern Hemisphere, you may want to install your collectors facing south to take advantage of the most direct sunlight.
Proper installation of your collectors will help ensure that they function at their full potential and provide the maximum amount of energy for your home.
Install your storage tank
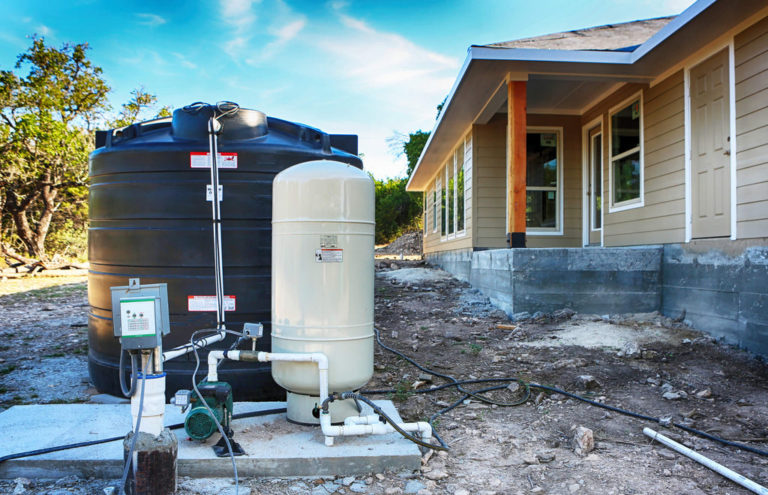
Choose a storage tank that is compatible with your collectors and your hot water needs. Make sure the tank is well-insulated to retain heat.
Installing your storage tank is a important step in your rainwater harvesting system.
It’s important to choose a storage tank that is compatible with your collectors and your hot water needs.
For instance, if you live in an area with cold winters, you may need a larger storage tank to accommodate the extra volume of water needed to meet your hot water demands.
Ensure the tank is well-insulated to retain heat, this can be done by using a tank with a thick insulation material, or by adding a layer of insulation around the tank.
This will help keep the water inside the tank warm, even in cold temperatures.
Proper installation of the storage tank will ensure that your rainwater harvesting system is functioning at its optimal level, and provide you with a reliable source of clean, potable water for your household needs.
Connect your collectors to your storage tank
Connect your collectors to your storage tank using appropriate plumbing and fittings. Make sure the connections are secure and watertight.
Connecting your collectors to your storage tank is a important step in establishing a functional rainwater harvesting system.
To do this, you’ll need to use appropriate plumbing and fittings that are designed for rainwater harvesting.
Start by selecting high-quality, food-grade pipes and fittings that can withstand the pressure and stress of holding water.
You’ll also need to ensure that all connections are secure and watertight to prevent leaks and contamination.
When connecting your collectors to your storage tank, it’s important to consider the size and shape of the tank, as well as the size and layout of your property.
A properly sized and configured system will ensure that water is collected and stored efficiently, while also minimizing the risk of overflow or spillage.
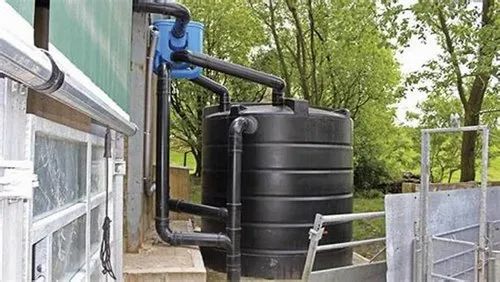
You should install a first flush device, which will capture and divert the first flow of water from the roof, reducing the amount of debris and contaminants that enter the storage tank.
Once your collectors are connected to your storage tank, be sure to inspect all connections for any signs of damage or wear.
Use Teflon tape or pipe dope to ensure a watertight seal, and check for any signs of leaks or weaknesses in the system.
By taking the time to properly connect your collectors to your storage tank, you’ll ensure that your rainwater harvesting system is reliable, efficient, and effective in collecting and storing rainwater for use in your home or business.
Test and maintain your system
Test your system to ensure it’s working properly, and maintain it regularly to ensure optimal performance. This includes checking for leaks, cleaning out debris, and ensuring that the collectors are angled correctly to maximize solar gain.
To ensure the optimal performance of your solar water heating system, it is essential to test and maintain it regularly.
This involves checking for any leaks, cleaning out any debris or sediment that may have accumulated, and ensuring that the collectors are angled correctly to maximize solar gain.
First, you should check the system for any leaks by turning on the water supply and verifying that there are no signs of water escaping from the system.
If you notice any leaks, it is important to address them promptly to prevent water damage and ensure the system operates efficiently.
Next, you should clean out any debris or sediment that may have accumulated in the system, including the collectors and the tank.
This will help to ensure that the system operates efficiently and that there is adequate space for the water to heat.
You should ensure that the collectors are angled correctly to maximize solar gain.
This may involve adjusting the position of the collectors to reflect the sun’s rays directly into the tank.
Proper angle alignment is important for maximizing the amount of solar energy that is absorbed by the system, which will in turn improve its performance and efficiency.
Want More? Dive Deeper Here!
Hey there! If you’re the type who loves going down the rabbit hole of information (like we do), you’re in the right spot. We’ve pulled together some cool reads and resources that dive a bit deeper into the stuff we chat about on our site. Whether you’re just killing time or super into the topic, these picks might just be what you’re looking for. Happy reading!


