
Looking to harness the power of wind energy for your generator batteries?
Want to build your own DIY wind turbine but not sure where to start?
Look no further!
With our step-by-step guide, you’ll learn how to construct a reliable and efficient wind turbine that will help charge your generator batteries and reduce your carbon footprint.
We’ll cover all aspects of the process, from selecting the right materials to installation and maintenance tips.
Let’s get started today!
Determine the design and size of your wind turbine
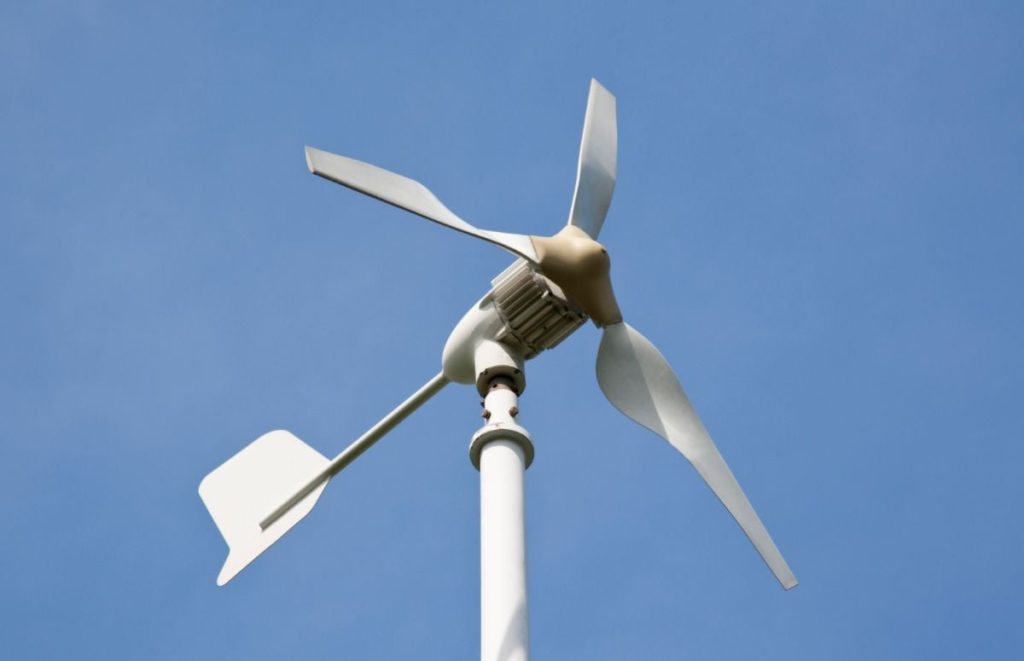
Before building your wind turbine, you need to decide on the design and size of the turbine. Consider the height and diameter of the rotor, the number of blades, and the type of generator you want to use.
The design and size of the turbine will not only impact its performance but also its cost and feasibility.
The key factors to consider when determining the design and size of your wind turbine are the height and diameter of the rotor, the number of blades, and the type of generator you want to use.
The height and diameter of the rotor are critical factors in determining the turbine’s power output.
A larger rotor diameter and height will expose the blades to more wind, resulting in higher power output.
However, larger rotors require more powerful generators and can be more expensive.
Therefore, it is essential to strike a balance between power output and cost.
The number of blades is another important factor to consider.
A larger number of blades can increase power output, but it also increases the weight and cost of the turbine.
Typically, wind turbines have two or three blades, but there are also designs with four or five blades.
The type of generator you choose will also impact the design and size of your wind turbine.
There are two main types of generators: direct-drive and geared.
Direct-drive generators are simpler and more reliable but require a stronger rotor design.
Geared generators are more complex but offer higher efficiency and power output.
Determining the design and size of your wind turbine is a critical decision that will impact its performance, cost, and feasibility.
By considering the height and diameter of the rotor, the number of blades, and the type of generator, you can select the best design for your wind turbine and harness the power of wind energy effectively.
Choose the materials for your wind turbine
Select the materials for your wind turbine, taking into account the strength, durability, and cost of each material. Common materials used for DIY wind turbines include wood, steel, and aluminum.
When selecting materials for your DIY wind turbine, it’s important to consider factors such as strength, durability, and cost.
Common materials used for wind turbines include wood, steel, and aluminum.
Wood is a popular choice for blades due to its lightweight and affordable nature, but it may not be as strong or durable as other materials.
Steel, on the other hand, is incredibly strong and durable but can be heavier and more expensive.
Aluminum is a good compromise between the two, offering a balance of strength, durability, and cost-effectiveness.
It’s important to consider the availability and locality of the materials, as well as any applicable regulations or certifications that may be required.
By carefully evaluating these factors, you can choose the best materials for your DIY wind turbine and ensure a successful and efficient energy-generating system.
Build the tower
The tower is the base of your wind turbine, and it’s important to build it sturdy to support the weight of the rotor and the generator. You can use steel or wood for the tower, and it should be at least 20 feet tall.
Building a sturdy tower is a critical component of your wind turbine project.
The tower supports the weight of the rotor and generator, so it’s essential to use durable materials and a strong foundation.
You can choose between steel or wood for the tower, each with its advantages and disadvantages.
Steel is more durable and resistant to corrosion, but it’s heavier and more expensive than wood.
Wood, on the other hand, is lighter and more cost-effective, but it may be more prone to rot and decay over time.
Regardless of your material choice, the tower must be at least 20 feet tall to accommodate the rotor and generator.
Make sure that the tower is stable and securely anchored to the ground to prevent any potential collapses or accidents.
Properly building the tower is a important step towards harnessing the power of wind energy and generating clean electricity for your home or business.
Build the rotor
The rotor is the main component of the wind turbine that converts wind energy into mechanical energy. It consists of blades attached to a hub, which is connected to the shaft of the generator. You can use wood or steel for the blades, and they should be between 2 and 3 feet long.
Building the rotor is a critical step in constructing a wind turbine.
The rotor is responsible for harnessing the power of the wind and converting it into mechanical energy.
The main components of the rotor are the blades, which are attached to a hub that is connected to the shaft of the generator.
The blades can be made from a variety of materials, such as wood or steel, and should be between 2 and 3 feet long.
The length of the blades is important as it determines the swept area, which is the area covered by the blades as they rotate.
A larger swept area can capture more wind energy and increase the efficiency of the turbine.
The angle of attack of the blades, which is the angle between the blade and the oncoming wind, can also affect the efficiency of the turbine.
By adjusting the angle of attack, the turbine can be optimized for different wind speeds and directions.
To build the rotor, you will need a variety of tools and materials, such as a drill press, a lathe, and metalworking fluids.
You will also need to select the appropriate materials for the blades, such as plywood or steel tubing, and attach them securely to the hub.
Proper assembly and maintenance of the rotor is important for ensuring the efficient operation of the wind turbine.
With careful planning and execution, you can build a high-quality rotor that will provide reliable performance and help you achieve your energy goals.
Install the generator
The generator converts the mechanical energy of the rotor into electrical energy. There are different types of generators available, such as permanent magnet generators, DC generators, and AC generators. Choose the one that suits your needs and budget.
Installing a generator is a important step towards harnessing the mechanical energy of the rotor and converting it into electrical energy.
There are various types of generators available, each with its own unique characteristics and benefits.
Permanent magnet generators, for instance, are highly efficient and require minimal maintenance, making them an excellent choice for those with limited budgets and simple energy needs.
DC generators, on the other hand, are more affordable and easier to install, making them a great option for those with basic energy requirements.
AC generators offer the highest level of efficiency and power output, making them ideal for larger, more complex systems.
When selecting a generator, it’s essential to consider factors such as your energy needs, budget, and system complexity to ensure you choose the one that best suits your requirements.
By doing so, you can ensure a reliable and efficient energy supply for your rotor system.
Install the electrical components
Install the electrical components, such as wiring, circuit breakers, and fuses, to connect the generator to your battery bank and inverter. Make sure all electrical components are properly insulated and connected to prevent any electrical hazards.
To install the electrical components, start by carefully reading the manual provided with your generator, battery bank, and inverter to ensure a proper understanding of the wiring configurations and any specific installation requirements.
This will help you avoid any potential electrical hazards and ensure a successful installation.
Once you have a clear understanding of the wiring configurations, begin by connecting the generator to your battery bank using the appropriate gauge wiring and connectors.
Make sure all connections are secure and properly insulated to prevent any electrical shorts or fires.
Install the circuit breakers and fuses to protect your electrical components from overloads and short circuits.
Properly insulate all electrical components and connections to prevent any electrical hazards.
Use a multimeter to test for proper voltage and continuity throughout the system, and make any necessary adjustments or repairs before energizing the system.
Carefully review all installation instructions and ensure that all components are properly secured and mounted before energizing the system.
Assemble the wind turbine
Once you have all the components ready, assemble the wind turbine by attaching the rotor to the tower, connecting the generator to the rotor, and installing the electrical components. Make sure all parts are securely attached and aligned properly to ensure efficient operation.
To assemble the wind turbine, first gather all the components and ensure they are clean, dry, and free of any damage.
The next step is to attach the rotor to the tower.
This can be done by bolting the rotor to the tower using the appropriate fasteners and torque specifications provided in the manufacturer’s instructions.
It is important to ensure that the rotor is properly aligned with the tower and that the blades are balanced to avoid any vibrations or uneven wear.
Once the rotor is securely attached to the tower, connect the generator to the rotor.
This is typically done using a gearbox and a bolting system that transfers power from the rotor to the generator.
Again, it is important to follow the manufacturer’s instructions carefully to avoid any damage or misalignment.
The final step is to install the electrical components, such as the transformer and the switchgear, to convert the electricity generated by the turbine into a usable form.
This involves connecting the generator to the transformer and the switchgear using appropriate cabling and wiring.
It is important to ensure that all electrical components are securely connected and properly insulated to avoid any electrical hazards or short circuits.
Throughout the assembly process, it is essential to pay close attention to the manufacturer’s instructions and guidelines to ensure that all components are securely attached and properly aligned for efficient operation.
It is recommended to have a certified technician on site to ensure that the assembly is done safely and to troubleshoot any potential issues that may arise during the process.
Test and maintain the wind turbine
Once the wind turbine is assembled, test it to ensure that it is working properly. Check the blades for any damage or wear and tear, and oil the moving parts regularly to keep them well-lubricated. Regular maintenance can extend the life of your wind turbine and ensure that it operates efficiently.
To ensure optimal performance and longevity of your wind turbine, it is important to test and maintain it regularly.
After the turbine is assembled, conduct thorough tests to verify that it is functioning properly.
This includes checking the blades for any damage or wear and tear, as well as lubricating the moving parts regularly to keep them well-lubricated.
Regular maintenance can extend the life of your wind turbine and ensure that it operates at its full potential.
Moreover, scheduling regular maintenance sessions can help detect potential issues before they escalate into major problems, saving you time and money in the long run.
By investing a small amount of time and resources into maintenance, you can significantly improve the overall efficiency and lifespan of your wind turbine.
Want More? Dive Deeper Here!
Hey there! If you’re the type who loves going down the rabbit hole of information (like we do), you’re in the right spot. We’ve pulled together some cool reads and resources that dive a bit deeper into the stuff we chat about on our site. Whether you’re just killing time or super into the topic, these picks might just be what you’re looking for. Happy reading!