
Installing a charge controller is a important step in setting up your solar power system.
This device ensures that your batteries are charged safely and efficiently by regulating the voltage and current coming from the solar panels.
We will walk you through the process of selecting, installing, and configuring a charge controller for your off-grid or grid-tied solar power system.
We’ll cover everything from understanding the different types of charge controllers available to troubleshooting common issues that may arise during installation.
Determine the type of charge controller you need
There are different types of charge controllers available, such as Pulse Width Modulation (PWM), Maximum Power Point Tracking (MPPT), and Synchronous Discharge (SD). Determine which type is suitable for your solar panel system based on factors such as the size of your system, the type of batteries you are using, and your budget.
There are three primary types of charge controllers available: Pulse Width Modulation (PWM), Maximum Power Point Tracking (MPPT), and Synchronous Discharge (SD).
Each of these types has its own advantages and disadvantages, and the best choice for your system will depend on factors such as the size of your system, the type of batteries you are using, and your budget.
PWM charge controllers are the most basic and simplest type of charge controller.
They work by adjusting the duty cycle of the solar panel to achieve a desired voltage and current output.
PWM controllers are often less expensive than other types of controllers, but they are not as efficient and may not be suitable for larger systems.
MPPT charge controllers, on the other hand, are more advanced and can maximize the power output of your solar panel system.
They work by tracking the maximum power point of the solar panel and adjusting the voltage and current output to achieve the highest possible power output.
MPPT controllers are more expensive than PWM controllers, but they are much more efficient and can provide up to 30% more power than a PWM controller.
SD charge controllers use a synchronous discharge method to control the charging of your batteries.
This method involves measuring the current and voltage of the batteries and adjusting the charging rate to achieve a consistent and safe charging rate.
SD controllers are often used in larger systems and are known for their high-quality and reliability.
When choosing a charge controller, it is important to consider the size of your system, the type of solar panels you are using, and the type of battery you will be using.
MPPT controllers are generally recommended for larger systems, while PWM controllers may be sufficient for smaller systems.
Determining the appropriate type of charge controller for your solar panel system is a important decision, as it can affect the performance and efficiency of your system.
There are three main types of charge controllers available: Pulse Width Modulation (PWM), Maximum Power Point Tracking (MPPT), and Synchronous Discharge (SD).
PWM charge controllers are the most basic type and are often less expensive than other controllers.
However, they are not as efficient and may not be suitable for larger systems.
PWM controllers work by adjusting the pulse width of the solar panel to regulate the amount of power that is sent to the battery.
While they are adequate for small systems, they may not provide the highest level of performance and efficiency.
MPPT charge controllers, on the other hand, are highly recommended for larger systems.
These controllers are able to maximize power output by tracking the maximum power point of the solar panels, resulting in higher efficiency and more power delivered to the battery.
MPPT controllers are more expensive than PWM controllers, but they are well worth the investment for larger systems.
SD charge controllers are typically used in more complex systems and are often chosen for their high-quality and reliability.
These controllers use a synchronous discharge method to regulate the power flow to the battery, ensuring that the battery is fully charged and ready to use when needed.
SD controllers are more expensive than PWM and MPPT controllers, but they offer the highest level of performance and reliability.
When choosing a charge controller, it is important to consider the size of your system, your budget, and your specific needs.
By doing so, you can determine the most appropriate type of charge controller for your needs and ensure that your system operates at the highest level of performance and efficiency.
Choose the right size of charge controller
Make sure you select a charge controller that is capable of handling the voltage and current output of your solar panel system. The charge controller should be able to manage the charging of your batteries efficiently and safely.
When selecting a charge controller for your solar panel system, it is important to choose the right size to ensure efficient and safe charging of your batteries.
The charge controller should be capable of handling the voltage and current output of your solar panel system, taking into account the size of your solar panel array, the type of batteries you are using, and the desired charging voltage and current.
A charge controller that is too small for your system may not be able to handle the voltage and current output, leading to inefficient charging, overcharging, or even damage to your batteries.
On the other hand, a charge controller that is too large for your system may result in unnecessary power losses and increased cost.
To choose the right size of charge controller, you should first determine the maximum voltage and current output of your solar panel array.
This information can usually be found on the manufacturer’s specifications or on the data sheet for the solar panel.
Next, you should select a charge controller that can handle the maximum voltage and current output of your solar panel array, while also taking into account the desired charging voltage and current for your batteries.
It is also important to consider the safety features of the charge controller, such as overvoltage protection, undervoltage protection, and short-circuit protection, to ensure safe and efficient charging of your batteries.
By selecting the right size of charge controller for your solar panel system, you can ensure optimal performance, efficient charging, and extended battery life.
Install the charge controller in a suitable location
The charge controller should be installed in a location that is accessible for monitoring and maintenance, and that is protected from extreme temperatures and moisture.
Installing the charge controller in a suitable location is important for optimal performance and longevity of your solar power system.
The charge controller should be placed in an easily accessible location, preferably in a well-ventilated and shaded area, to ensure proper monitoring and maintenance.
It should be protected from extreme temperatures, such as direct sunlight or frost, which can damage the components and affect its performance.
It should be shielded from moisture, such as rain or humidity, to prevent any water intrusion and damage to the electronics.
A location with good air circulation and no obstructions to the sun’s rays will also help to keep the charge controller cool and efficient.
Overall, the location of the charge controller is a critical factor to consider for a successful and trouble-free solar power system installation.
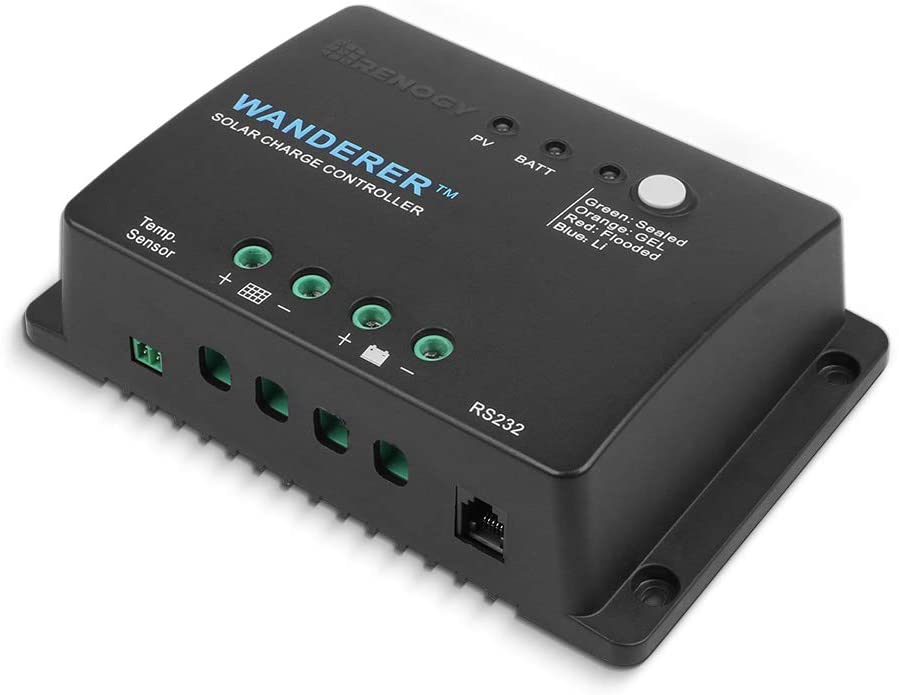
Connect the charge controller to the solar panel array
Connect the positive lead of the solar panel array to the charge controller’s positive terminal, and the negative lead to the charge controller’s negative terminal. Make sure the connections are secure and protected from moisture and corrosion.
When connecting the charge controller to the solar panel array, it is essential to ensure a secure and moisture-free connection.
Start by connecting the positive lead of the solar panel array to the charge controller’s positive terminal.
Use a sturdy cable and secure the connection with a suitable cable tie or connector.
Make sure the cable is long enough to accommodate any required clearance from the solar panel array to the charge controller.
Next, connect the negative lead of the solar panel array to the charge controller’s negative terminal.
Again, use a sturdy cable and secure the connection with a suitable cable tie or connector.
It is important to ensure the connections are tight and free from moisture to prevent corrosion and ensure reliable operation.
To prevent water or moisture from entering the connections, apply a layer of silicone sealant or protection tape around the cables and connectors.
Connect the charge controller to the battery bank
Connect the positive lead of the battery bank to the charge controller’s positive terminal, and the negative lead to the charge controller’s negative terminal. Make sure the connections are secure and protected from moisture and corrosion.
To ensure proper functionality and longevity of your off-grid solar power system, it is essential to connect the charge controller to the battery bank correctly.
First, connect the positive lead of the battery bank to the charge controller’s positive terminal.
This is typically marked with a + symbol or a colored wire that corresponds to the positive lead.
Next, connect the negative lead of the battery bank to the charge controller’s negative terminal.
This is typically marked with a – symbol or a colored wire that corresponds to the negative lead.
It is important to make sure the connections are secure and protected from moisture and corrosion.
Use high-quality, heavy-duty cable lugs and heat-shrink tubing to secure the connections and protect them from the elements.
Tighten the connections firmly to prevent any loose or slippage over time.
Ensure that the charge controller is properly grounded to the system’s grounding bus, which is typically marked with a ground symbol (-) or a green wire.
Set the charge controller’s parameters
The charge controller should be set up to match the specific requirements of your solar panel system and battery bank. This may include setting the charging voltage and current, and adjusting other parameters such as the charging rate and termination voltage.
To effectively set the charge controller’s parameters, it is important to consider the specific requirements of your solar panel system and battery bank.
The charge controller should be configured to match the voltage and current output of your solar panels, as well as the capacity and age of your battery bank.
This includes setting the charging voltage and current, as well as adjusting other parameters such as the charging rate and termination voltage.
The charging voltage should be set to the optimal level for your solar panels, which can vary depending on the type and quality of the panels.
For example, most solar panels operate best at a charging voltage of around 14-16 volts.
The charging current should also be set to the appropriate level based on the capacity of your battery bank and the output of your solar panels.
In addition to setting the charging voltage and current, it is important to adjust other parameters such as the charging rate and termination voltage.
The charging rate should be set to a level that allows for efficient charging of your battery bank without overheating or overcharging.
The termination voltage should be set to the appropriate level to prevent overcharging and extend the life of your batteries.
Overall, properly setting the charge controller’s parameters is important for ensuring efficient and safe operation of your solar panel system and battery bank.
It is important to carefully consider the specific requirements of your system and consult the manufacturer’s guidelines to ensure proper setup and optimization of your charge controller.
Test the charge controller
Once the charge controller is installed and connected, test it to ensure it is functioning properly. This may include monitoring the voltage and current output of the solar panel array, and checking that the charge controller is properly balancing the charge and discharge of the battery bank.
To ensure optimal performance of your off-grid solar power system, it is important to test the charge controller after installation and connection.
This critical step involves monitoring the voltage and current output of the solar panel array, as well as checking the charge controller’s ability to properly balance the charge and discharge of the battery bank.
First, monitor the voltage output of the solar panel array to ensure it is within the specified range for your specific charge controller.
This can typically be done using a multimeter or a dedicated solar panel monitoring device.
Next, check the current output of the solar panel array to ensure it is also within the specified range.
An inaccurate current reading can cause issues with the charge controller and potentially damage the battery bank.
Next, check the balance of the charge and discharge of the battery bank.
The charge controller should be able to properly regulate the flow of energy between the solar panel array and the battery bank.
To do this, you can use a multimeter to measure the voltage and current of the battery bank during both charge and discharge cycles.
If the charge controller is not properly balancing the charge and discharge, it may result in premature wear on the battery bank or cause it to underperform.
By carefully monitoring the voltage and current output of the solar panel array, as well as the balance of the charge and discharge of the battery bank, you can ensure that your off-grid solar power system is functioning optimally and provide you with reliable, clean energy for years to come.
Monitor and maintain the charge controller
Regularly monitor the charge controller to ensure it is functioning properly and making any necessary adjustments. This may include checking the voltage and current output of the solar panel array, and adjusting the charge controller’s parameters as needed. make sure to keep the charge controller clean and free of moisture, and perform any necessary maintenance tasks to ensure it continues to function properly over time.
Monitoring and maintaining the charge controller is an essential aspect of ensuring the optimal performance of your solar power system.
It is important to regularly check the voltage and current output of the solar panel array and adjust the charge controller’s parameters as needed.
This may involve calibrating the charge controller to ensure it is accurately regulating the flow of energy between the solar panel array and the battery bank.
It is important to keep the charge controller clean and free of moisture, as dirt and moisture can impede its performance.
To ensure long-term optimal performance, it is important to perform regular maintenance tasks on the charge controller.
This may include cleaning the unit, checking for any loose connections, and replacing any components that are damaged or worn out.
It is a good idea to regularly inspect the charge controller’s connectors and wiring to ensure they are secure and free of damage.
By performing these maintenance tasks, you can help ensure that your charge controller continues to function properly over time.
Want More? Dive Deeper Here!
Hey there! If you’re the type who loves going down the rabbit hole of information (like we do), you’re in the right spot. We’ve pulled together some cool reads and resources that dive a bit deeper into the stuff we chat about on our site. Whether you’re just killing time or super into the topic, these picks might just be what you’re looking for. Happy reading!