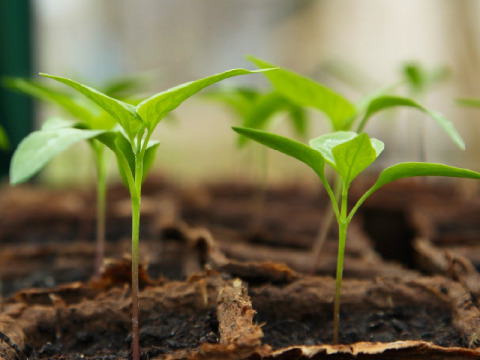
Spring may be months away, but with a little magic and some simple tools, you can jumpstart your summer harvest by starting seeds indoors.
By leveraging the power of sunlight, soil, and patience, you’ll be able to cultivate healthy seedlings that will thrive once transplanted outdoors.
Whether you’re a seasoned gardener or just beginning, starting seeds indoors is an accessible and rewarding way to guarantee a bountiful harvest this summer.
We’ll explore the ins and outs of seed starting so that you can reap the benefits of a head start on your garden.
Get ready to unlock the magic of seed starting!
Choose the right seeds
Not all plants are suitable for indoor seed starting. Look for seeds that germinate quickly, grow slowly, and have a shorter maturity date. Good options include tomatoes, peppers, basil, and cucumbers.
Not all plants are suitable for indoor seed starting, so it’s important to choose seeds that germinate quickly, grow slowly, and have a shorter maturity date.
Some excellent options include tomatoes, peppers, basil, and cucumbers.
Tomatoes, for instance, are a popular choice for indoor seed starting because they germinate quickly and grow slowly, giving you ample time to prepare their final growing location before transplanting.
Look for determinate varieties like ‘Bush Early Girl’ or ‘Patio’ for best results.
Peppers, such as bell peppers or sweet peppers, also make great choices for indoor seed starting.
They germinate quickly, grow slowly, and have a relatively short maturity date, typically around 60-70 days.
‘California Wonder’ and ‘Bird’s Eye’ are excellent varieties to consider.
Basil is another ideal choice for indoor seed starting, as it germinates rapidly and grows slowly.
With its relatively short maturity date of around 45-60 days, you can enjoy multiple harvests from a single plant.
‘Sweet Basil’ and ‘Genovese’ are two popular varieties that perform well in indoor conditions.
Cucumbers are a great option for indoor seed starting, as they germinate quickly and grow slowly, maturing in around 50-60 days.
‘Bush Pickle’ and ‘Salem’ are two varieties that thrive in indoor conditions.
By selecting these varieties and following proper indoor seed starting techniques, you can enjoy successful and productive plant growth, even in the coldest of climates.
Elaboration on Choosing the Right Seeds for Indoor Seed Starting
When it comes to indoor seed starting, selecting the right seeds is important for success.
Some plants are better suited for indoor growing than others, and choosing the right seeds can make all the difference.
Look for seeds that germinate quickly, grow slowly, and have a shorter maturity date.
These traits are ideal for indoor seed starting because they allow for more control over the growing environment and ensure that the plants don’t outgrow their container before they reach maturity.
One of the best types of seeds for indoor seed starting is basil.
Basil germinates rapidly and grows slowly, making it an ideal choice for indoor growing.
With its relatively short maturity date of around 45-60 days, you can enjoy multiple harvests from a single plant.
Basil is a warm-season crop, meaning it thrives in the warm temperatures typically found indoors during the spring and summer months.
Another great option for indoor seed starting is lettuce.
Lettuce seeds germinate quickly and grow relatively slowly, making them perfect for indoor growing.
These traits also make lettuce an excellent choice for areas with limited space or for those just starting out with seed starting.
With a maturity date of around 40-50 days, you can enjoy multiple harvests from a single plant, and with its cool-season growth habits, it does well in the cooler indoor temperatures of spring and fall.
When choosing seeds for indoor seed starting, look for those that germinate quickly, grow slowly, and have a shorter maturity date.
These traits ensure the best possible outcome for your indoor growing endeavors, and the best plants for indoor seed starting include basil and lettuce.
With these tips in mind, you’ll be well on your way to successful indoor seed starting and a productive indoor garden.]]]
Choosing the right seeds for indoor seed starting is important for a successful garden.
Look for seeds that germinate quickly, grow slowly, and have a shorter maturity date.
These traits ensure the best possible outcome for your indoor growing endeavors.
Basil is an excellent choice for indoor seed starting, as it thrives in the warm temperatures typically found indoors during the spring and summer months.
Its germination rate is quick, and it grows relatively slowly, making it perfect for indoor growing.
With a maturity date of around 40-50 days, you can enjoy multiple harvests from a single plant.
Lettuce is another great option for indoor seed starting.
Its seeds germinate quickly, and it grows relatively slowly, making it ideal for indoor containers.
With a maturity date of around 40-50 days, you can enjoy multiple harvests from a single plant.
Incorporating both basil and lettuce into your indoor garden will provide a productive and diverse growing space.
With the right seeds and proper care, you’ll be well on your way to a successful indoor garden.]]]
Choosing the right seeds for indoor seed starting is essential for a productive and successful indoor garden.
To ensure the best possible outcome, look for seeds that exhibit certain desirable traits, such as quick germination, slow growth, and a shorter maturity date.
Two excellent options for indoor seed starting are basil and lettuce.
Basil is an outstanding choice for indoor gardening.
Its seeds germinate rapidly, and the plant grows relatively slowly, making it perfect for indoor containers.
Basil can be harvested multiple times throughout its maturity period of approximately 40-50 days, offering a bountiful and ongoing yield.
With regular pruning, basil can be successfully grown year-round in an indoor garden, providing a constant supply of fresh, flavorful leaves for cooking and culinary use.
Similarly, lettuce is a popular choice for indoor seed starting.
This cool-season crop thrives in the controlled environment of an indoor garden, where lighting and temperature can be precisely regulated.
Lettuce seeds germinate rapidly and grow slowly, making it well-suited for container gardening.
Like basil, lettuce can be harvested multiple times during its maturity period of around 40-50 days, providing a consistent supply of crisp, nutritious leaves for salads and other dishes.
Prepare the soil
Use a well-draining seed starting mix and avoid using soil from your garden, as it may contain diseases that can infect your seedlings. Test the pH of your soil and adjust it if necessary for the specific seeds you are growing.
Preparing the soil is a important step before starting your seedlings.
To ensure a healthy and successful growth, use a well-draining seed starting mix that is specifically designed for seed germination.
Avoid using soil from your garden, as it may contain diseases that can infect your seedlings and stunt their growth.
Instead, opt for a fresh and sterile seed starting mix that is free of any potential pathogens.
Another important consideration is the pH level of your soil.
Different seeds have specific pH requirements for optimal growth, so it’s essential to test the pH of your soil and adjust it if necessary.
You can use a soil test kit to determine the pH level of your soil, and then use lime or peat moss to adjust the pH accordingly.
For example, if you’re growing tomatoes, they prefer a slightly acidic soil pH of around 6.0 to 6.8, while peppers and cucumbers prefer a more neutral soil pH of around 6.0 to 7.0.
By testing and adjusting your soil’s pH, you can ensure that your seedlings have the optimal growing conditions for healthy growth and productivity.
Provide adequate light
Most seedlings need at least 6 hours of direct sunlight per day. Use grow lights if necessary to ensure adequate light.
To ensure optimal growth and development, most seedlings require at least 6 hours of direct sunlight per day.
This is essential for photosynthesis, the process by which plants convert light energy into chemical energy.
Without enough light, seedlings may struggle to grow and develop properly, leading to stunted growth, weakened immune systems, and increased susceptibility to pests and diseases.
If your seedlings don’t have access to enough natural light, you may need to use grow lights to supplement their light needs.
Grow lights can provide the necessary light spectrum and intensity for optimal growth, and they can be positioned and adjusted as needed to ensure that your seedlings receive the right amount of light.
By providing adequate light, you can help your seedlings thrive and reach their full potential.
Maintain ideal temperatures
Keep the soil at a consistent temperature between 65-75 degrees Fahrenheit. Avoid placing seedlings near heating or cooling vents.
Maintaining ideal temperatures is important for the healthy growth and development of seedlings.
The optimal temperature range for seedlings is between 65-75 degrees Fahrenheit, which promotes optimal root growth and stem elongation.
If the temperature falls below 65 degrees, the seedlings may become lethargic and growth may slow down.
On the other hand, if the temperature rises above 75 degrees, the seedlings may become stressed and may be more susceptible to disease.
Therefore, it is essential to maintain a consistent temperature within this range, avoiding any sudden changes that could shock the seedlings.
It is important to avoid placing seedlings near heating or cooling vents, as these can cause sudden changes in temperature that can be detrimental to the seedlings’ health.
By maintaining ideal temperatures, you can ensure that your seedlings grow strong and healthy, setting them up for success in the garden or indoor space.
Water correctly
Water seedlings gently but thoroughly. Avoid getting water on the leaves or crown of the plant. Water the soil, not the leaves.
When it comes to watering your seedlings, it’s essential to do so correctly to ensure their healthy growth and survival.
First, water your seedlings gently but thoroughly.
Avoid getting water on the leaves or crown of the plant, as this can cause fungal diseases to develop.
Instead, focus on watering the soil around the base of the plant.
This will help the roots grow strong and healthy, which is essential for the plant’s overall well-being.
Second, avoid overwatering your seedlings.
Too much moisture can cause the roots to rot, leading to stunted growth and reduced yields.
Check the soil daily and only water when it feels dry to the touch.
Third, consider using a watering wand or spray bottle to deliver the water directly to the soil without getting any on the leaves or crown.
This will help prevent fungal diseases and ensure that your seedlings are getting the right amount of moisture.
With proper watering, your seedlings will grow strong and healthy, setting them up for success in the garden.
Fertilize sparingly
Seedlings don’t need much fertilizer. Wait until they have at least two sets of true leaves before fertilizing with a balanced, water-soluble fertilizer.
When it comes to fertilizing your seedlings, it’s important to err on the side of caution and fertilize sparingly.
This is because seedlings don’t need much fertilizer, especially in the early stages of their growth.
In fact, too much fertilizer can actually do more harm than good, causing the seedlings to grow too quickly and become vulnerable to disease and pests.
Instead, wait until your seedlings have at least two sets of true leaves before fertilizing with a balanced, water-soluble fertilizer.
This will give your seedlings a gentle boost of nutrients without overwhelming them.
Be sure to follow the instructions on the fertilizer packaging and start with a weak solution, gradually increasing the strength as needed.
This will help ensure that your seedlings are getting just the right amount of nutrients for their needs.
Monitor for pests
Check your seedlings daily for signs of pests, such as aphids, spider mites, or whiteflies. Isolate infected seedlings to prevent the spread of disease.
As a grower, it’s essential to monitor your seedlings daily for any signs of pests, such as aphids, spider mites, or whiteflies.
These tiny creatures can quickly multiply and cause irreparable damage to your delicate seedlings.
To prevent the spread of disease, isolate any infected seedlings immediately and take action to eradicate the pests.
Check your seedlings carefully, looking for any signs of infestation, such as sticky residue, discoloration, or the actual pests themselves.
If you notice any issues, treat the seedlings promptly with insecticidal soap or neem oil.
Remember, an ounce of prevention is worth a pound of cure, so stay vigilant and take action as soon as you suspect any pest activity.
Transplant seedlings carefully
When transplanting seedlings to the garden, handle them carefully to avoid disturbing the roots. Harden off the seedlings before transplanting by gradually exposing them to outdoor conditions over the course of 7-10 days.
When transplanting seedlings to the garden, it is important to handle them with care to avoid disturbing their delicate roots.
To ensure a successful transplant, it is essential to harden off the seedlings before introducing them to the outdoor environment.
This process involves gradually exposing the seedlings to outdoor conditions over the course of 7-10 days, allowing them to acclimate to the sun, wind, and other environmental factors.
By doing so, the seedlings will develop stronger roots and be better equipped to thrive in their new environment.
To harden off seedlings, start by moving them to a shaded location outdoors for the first few days.
Gradually increase the amount of sunlight they receive over the next few days, while also ensuring they are receiving enough water.
It is important to avoid overwatering, as this can lead to root rot and other problems.
Once the seedlings have been hardened off, they can be transplanted to their final destination in the garden.
When transplanting, gently dig around the seedling with a spade, being careful not to disturb the roots.
Place the seedling in its new location, making sure the soil is firmly packed around the roots to prevent them from drying out.
With proper care and attention, the hardened off seedlings should thrive in their new home.
Want More? Dive Deeper Here!
Hey there! If you’re the type who loves going down the rabbit hole of information (like we do), you’re in the right spot. We’ve pulled together some cool reads and resources that dive a bit deeper into the stuff we chat about on our site. Whether you’re just killing time or super into the topic, these picks might just be what you’re looking for. Happy reading!
- Einaudi Center funds research on food crisis, World Trade Organization, biofuels and more | Cornell Chronicle
- Cornell partners in NSF grant for astrophysics institute | Cornell Chronicle
- Long Journey into Orange – Grow
- Cover Crops | Growing Franklin | Page 2
- (PDF) From Garden to Table: Leafy Greens! (H1754)

